An effective project management system organizes, tracks, and executes work within a project. Projects are collections of tasks that aim to achieve a specific objective. In order to meet your project's requirements on time, project management can help your team plan, manage, and execute your work.
Projectsly is one such software designed to manage all your projects end to end. Start creating projects, tracking tasks, defining workflows, and managing your work with Projectsly.
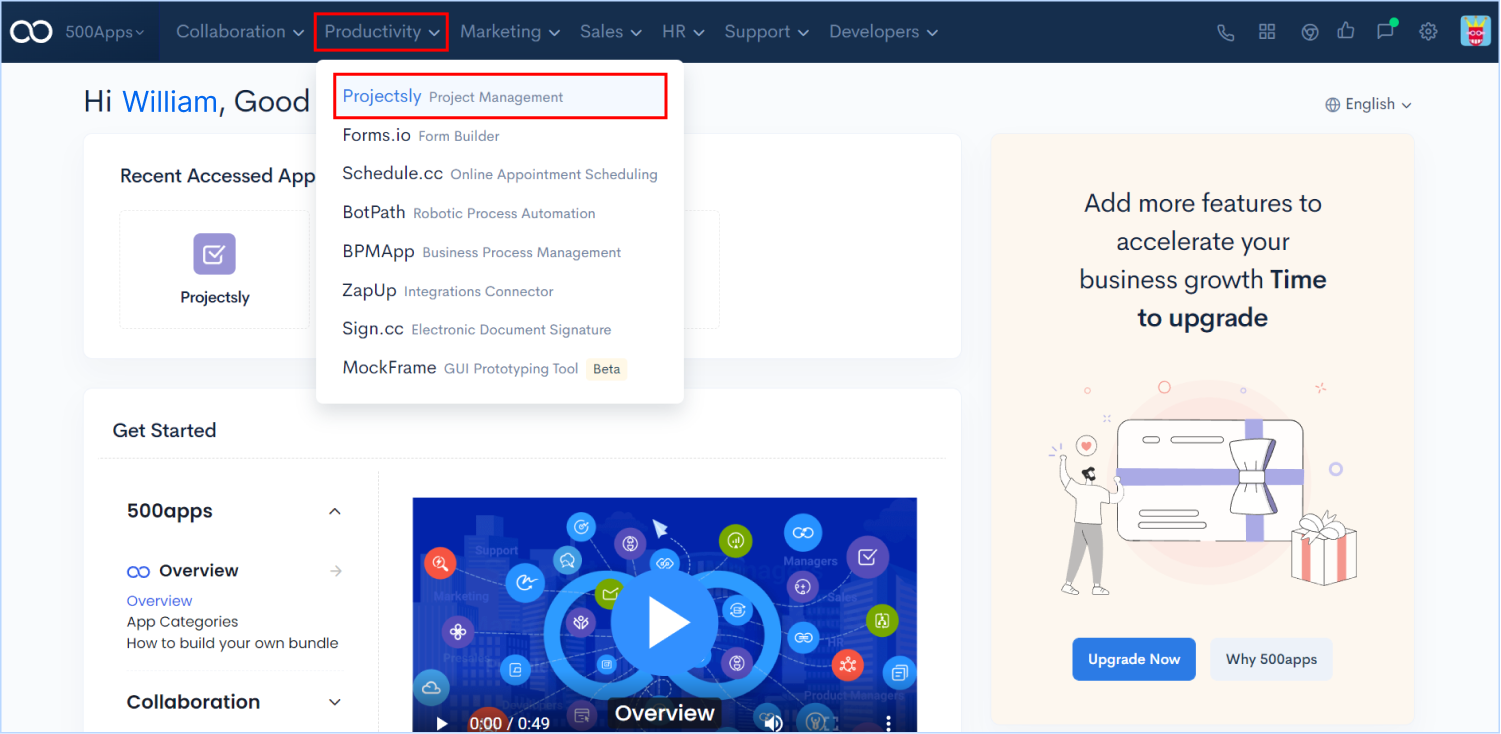
Go to infinity.500apps.com > Find Productivity on the top section of the suite > Select Projectsly from the dropdown option under Productivity
Start adding new projects to the workspace by giving them a specific name, description, and unique icon.
Click on Create Project and find the window (Add Project) to give project details.
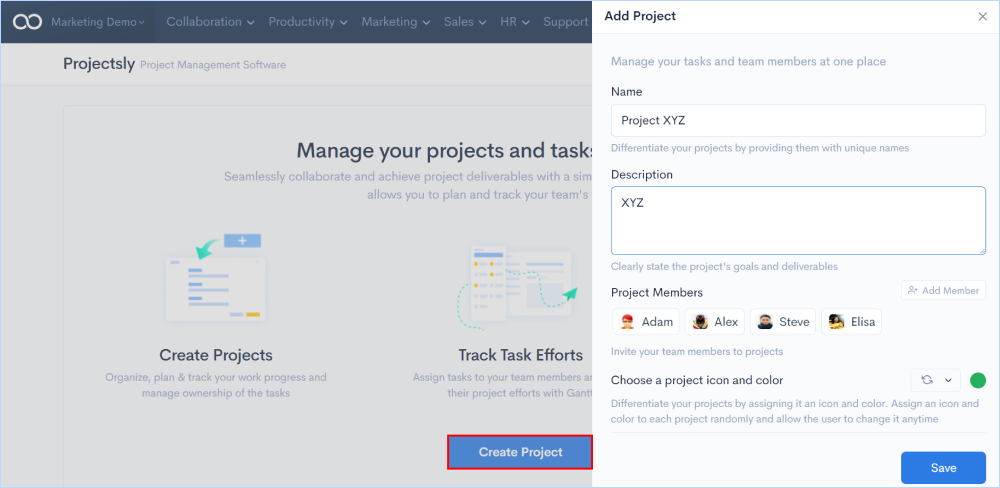
Add project team members from the existing list or invite them through the mail.
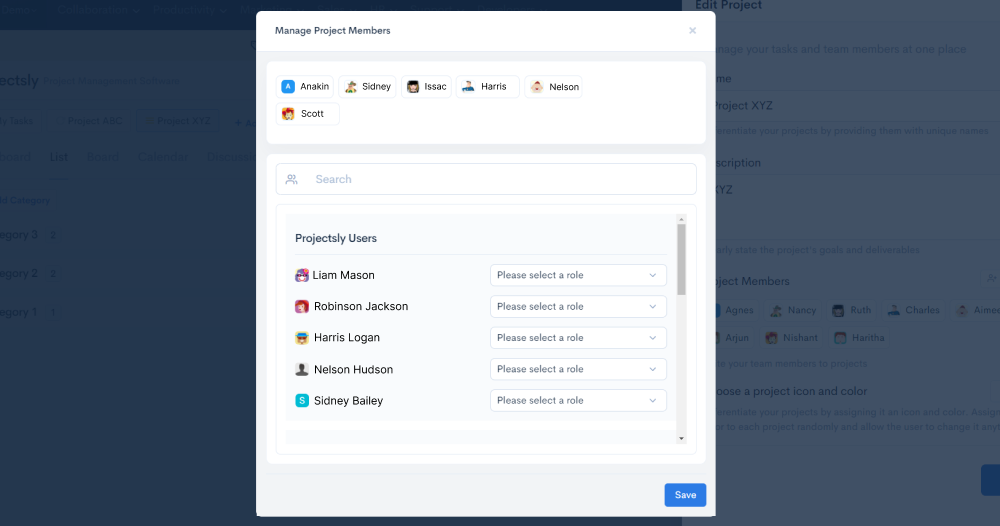
Click on Add Member from the Add Project window.

Assign specific roles to each member by adding them to the project. Once the members are chosen, click on Save.
You will enter into the workspace of Forms.io where you’ll be displayed with all features of the application.
When the details have been updated, choose a template from the library to begin working on the project.

If you want to make changes to the project you have created in terms of name, description, more members to be added or remove, you'll get the edit option to do the same. Hover over the project you have newly created and you'll find the Edit and Delete options. Click on the Edit button to make changes to the above mentioned details or click on the Delete button to remove the project you have created.

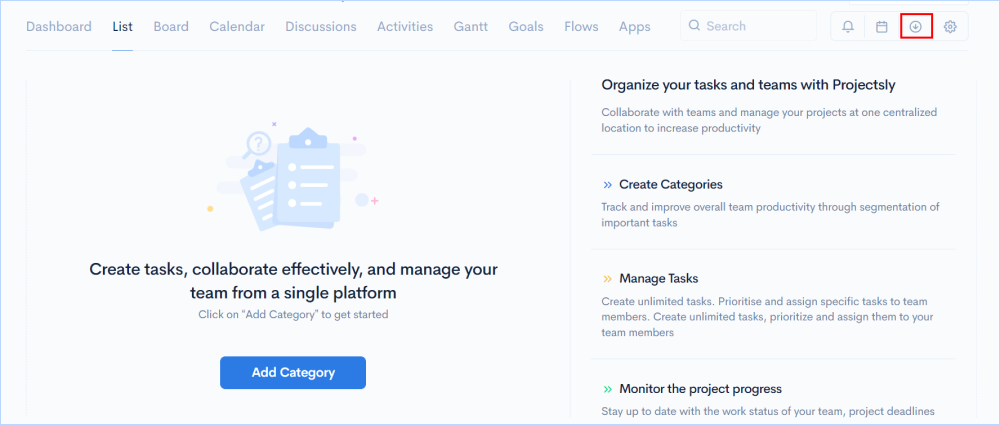
Once you are in the workspace of Projectsly, there are 2 ways you can add categories and tasks to them:
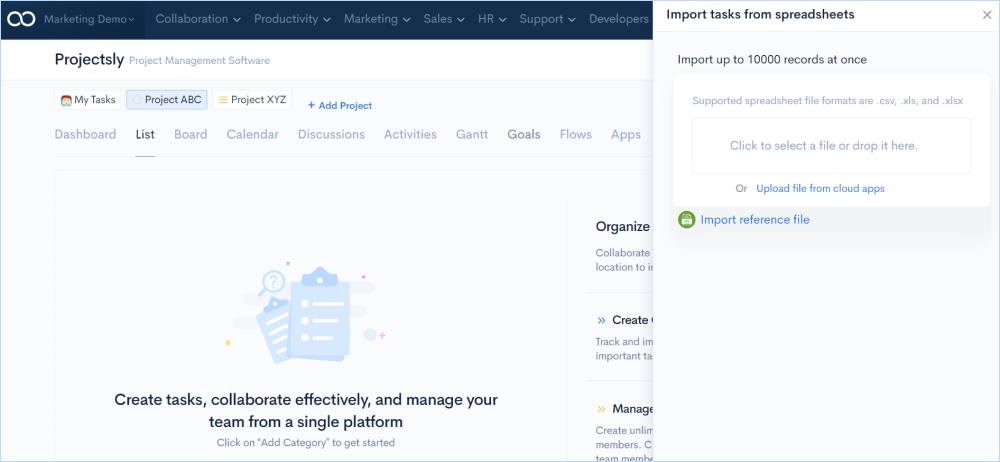
If you have already set up categories and tasks for the team in a spreadsheet, import them into the workspace in any format of .csv, .xls, and .xlsx.
According to the reference file provided, it is necessary to format the spreadsheet tasks in the same way. You can upload the file either from the system or from any cloud app.
Create categories and tasks manually in the workspace in any preferred view - List, Kanban, Calendar views.
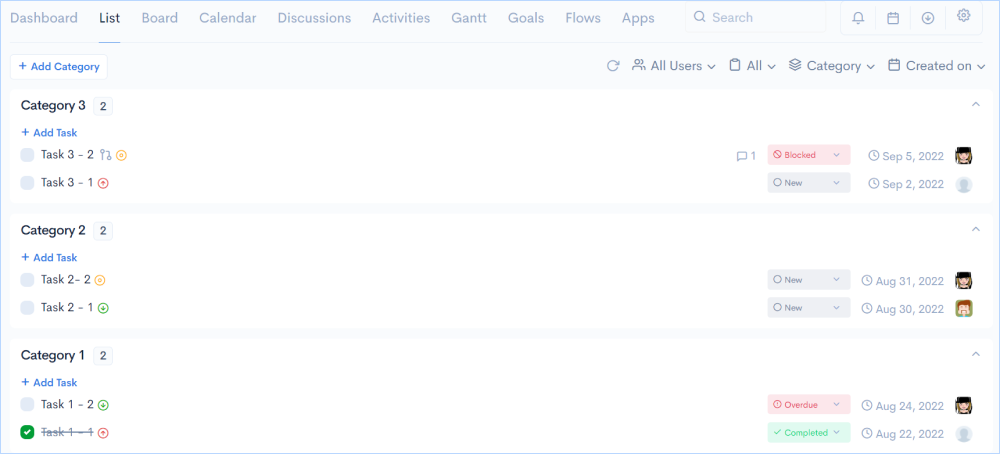
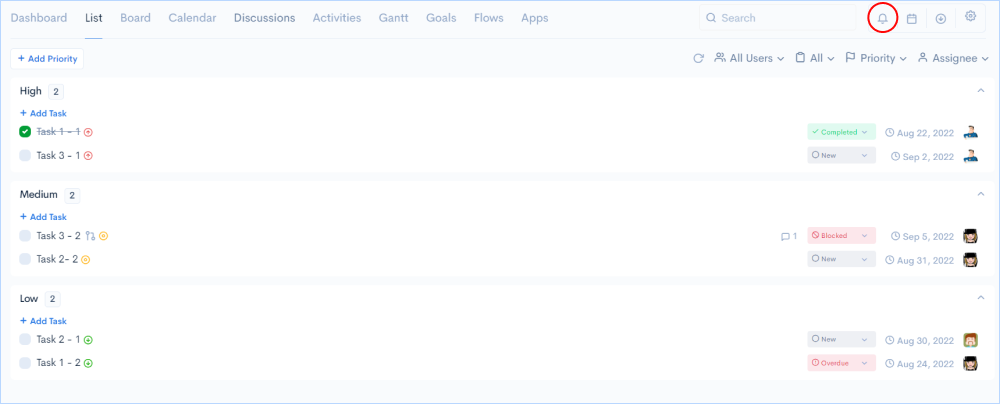
Projectsly's list view comes with a grid-like structure where categories and tasks are displayed horizontally to avoid clustering along with details of assignee, due date, task status and priority. You can start adding tasks in each category you create and set the required parameters for each task.
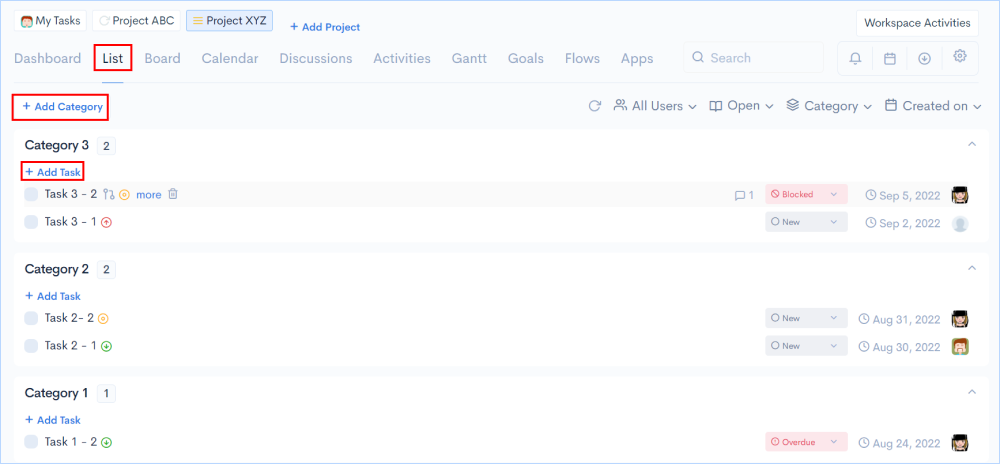
Go to List > Click on Add Category - Start creating categories by giving them specific names. Next Click on Add Task - Create tasks with specific names and parameters under each category.
Now that you have created tasks under various categories, next you have to assign them to your team, give deadlines to finish the tasks, and set the priority (High, Medium, Low).
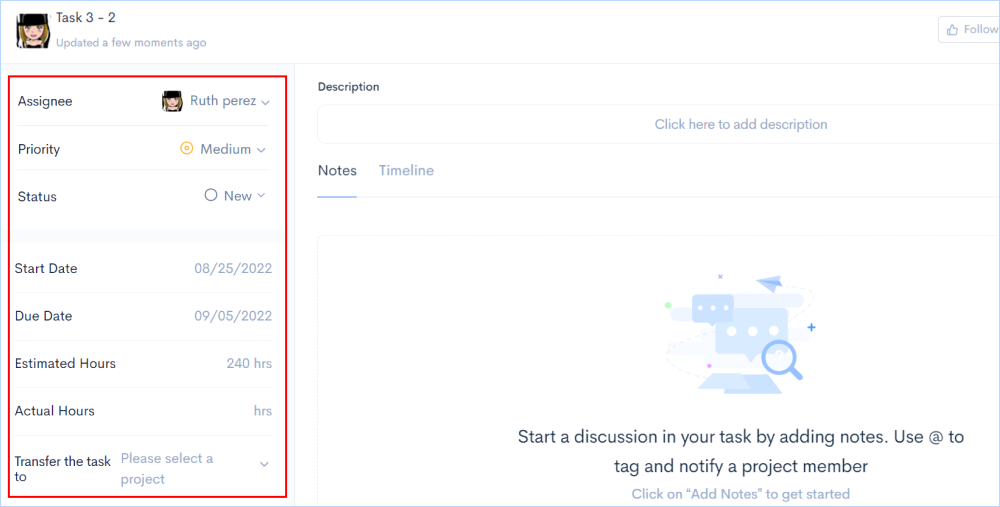
Hover over any task and click on More. You will be getting a window to set all parameters for the chosen task.

We have given a section for adding the description for the respective task and also to add important notes on working on the task.
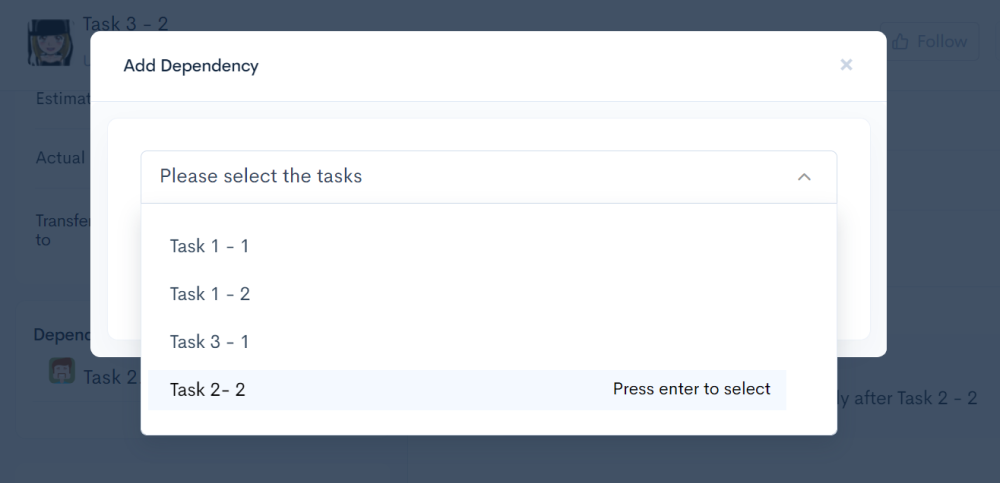
Task dependency in Projectsly allows you to define the order in which tasks should be performed based on relationships between them. In case a new task cannot be started until an ongoing task is completed, then you can mark dependency of new on the old task. Identifying task dependencies makes it clear which tasks are ready to begin, and which tasks are waiting for others to begin.
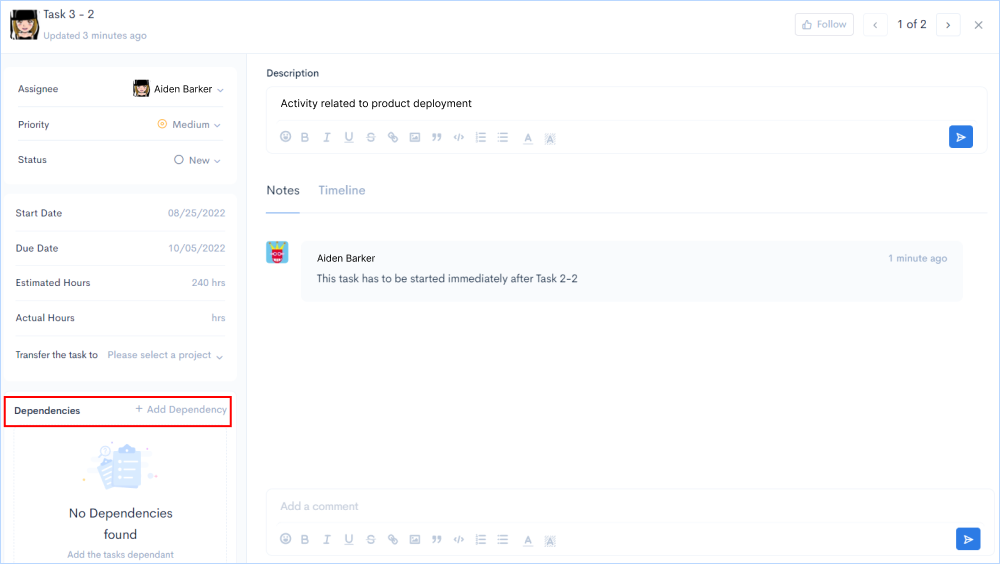
Go to the window of setting the task parameter and click on Add Dependency. A popup window appears with the list of all the tasks been created. Choose the task that is being depended on.

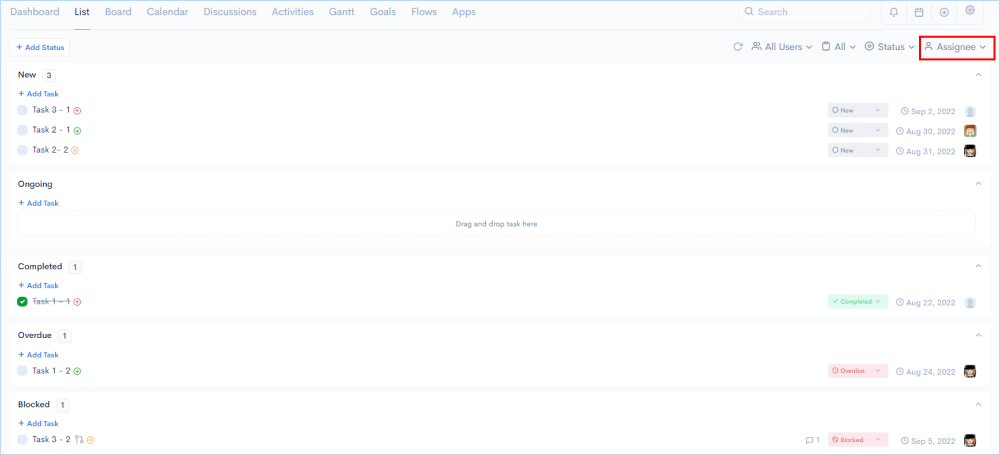
Group all the tasks based on your preference - Group by Category / Status / Priority / Due date. Once you select the filter you can see all the tasks being organized according to the chosen filter.
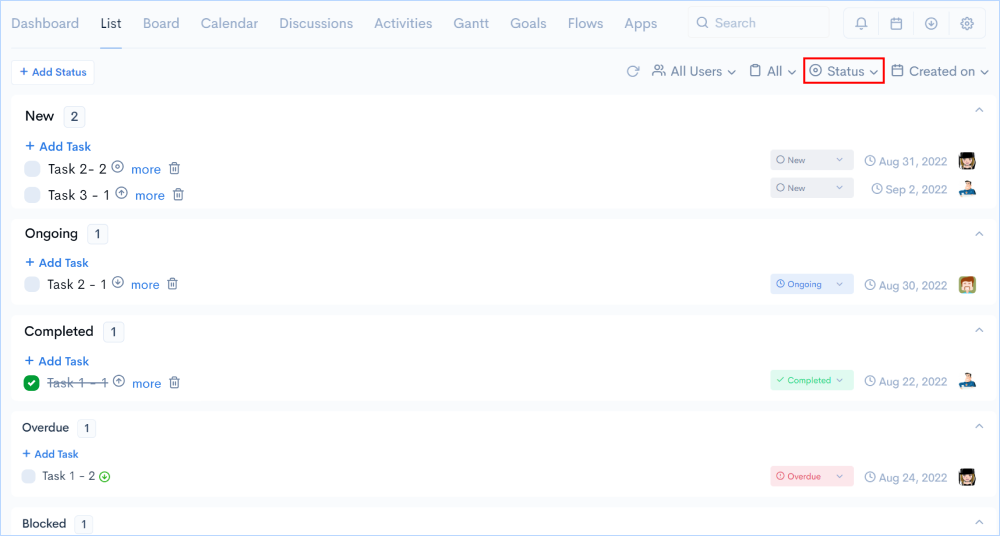
Sort all the tasks based on your preference - Sort by Date created / Status / Priority / Assignee / Due date. Once you select the filter you can see all the tasks being organized according to the chosen filter.
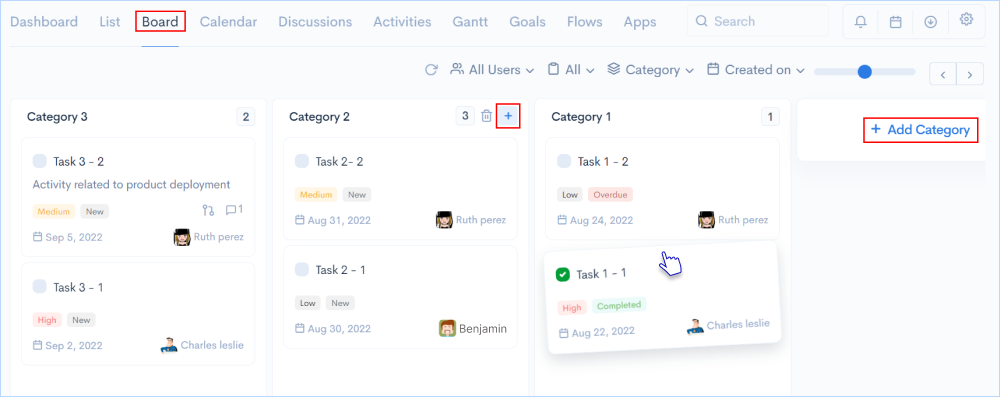
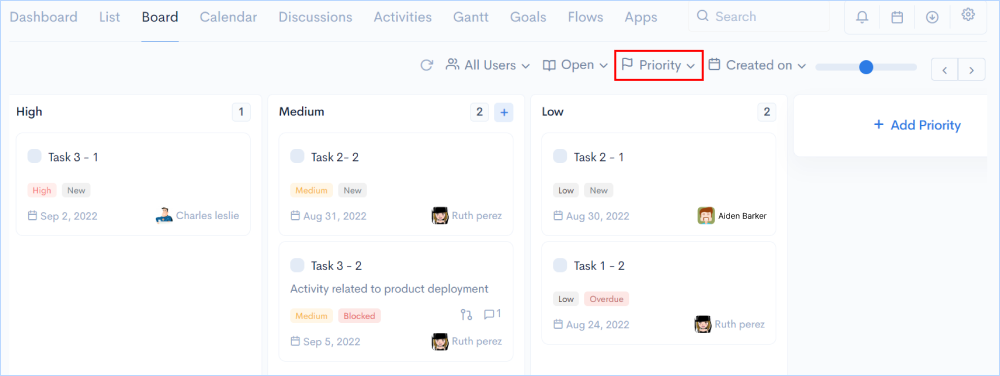
Projectsly’s Kanban view gives a visual representation of individual tasks in the form of boards/cards organized in columns. Kanban board gives your team a clear view of the tasks everyone is working on and their progress. You can move the cards across the columns by easy drag and drop to change the task status or to change the category.
Go to Board > Click on Add Category - Start creating categories by giving them specific names. Next hover over any category and click on ‘+’ - Create tasks with specific names and parameters under each category.
Now that you have created tasks under various categories, next you have to assign them to your team, give deadlines to finish the tasks, and set the priority (High, Medium, Low).
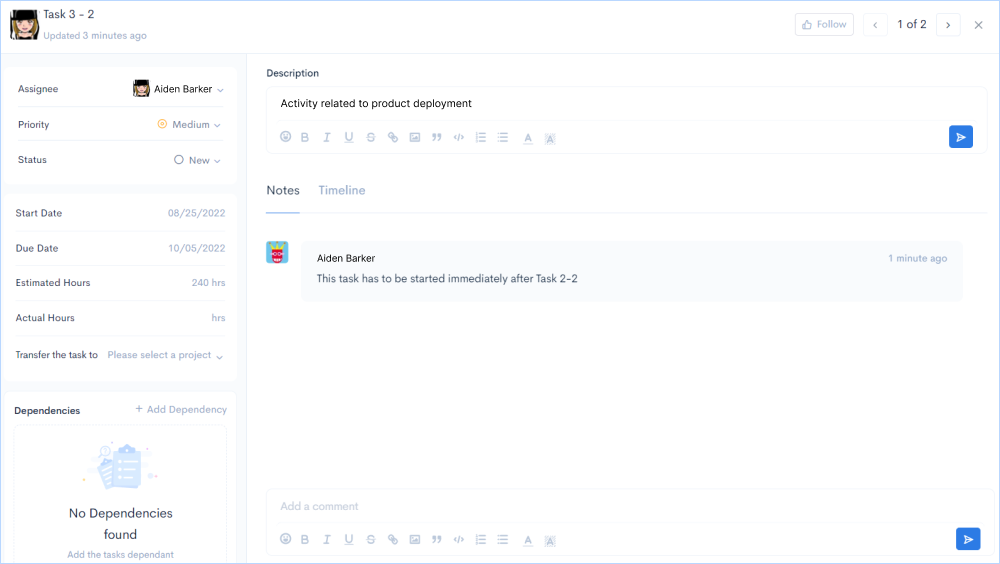
Hover over any task and click on More. You will be getting a window to set all parameters for the chosen task.
We have given a section for adding the description for the respective task and also to add important notes on working on the task.
Task dependency in Projectsly allows you to define the order in which tasks should be performed based on relationships between them. In case a new task cannot be started until an ongoing task is completed, then you can mark dependency of new on the old task.

Go to the window of setting the task parameter and click on Add Dependency. A popup window appears with the list of all the tasks been created. Choose the task that is being depended on.
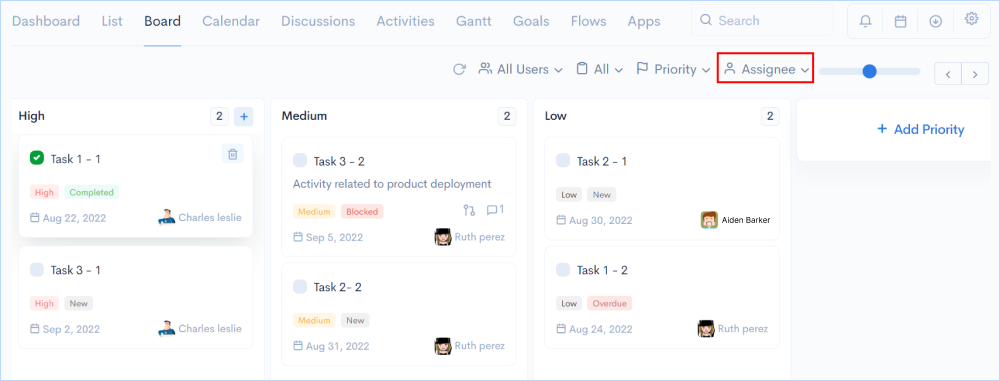
Group all the tasks based on your preference - Group by Category / Status / Priority / Due date. Once you select the filter you can see all the tasks being organized according to the chosen filter.
Sort all the tasks based on your preference - Sort by Date created / Status / Priority / Assignee / Due date. Once you select the filter you can see all the tasks being organized according to the chosen filter.
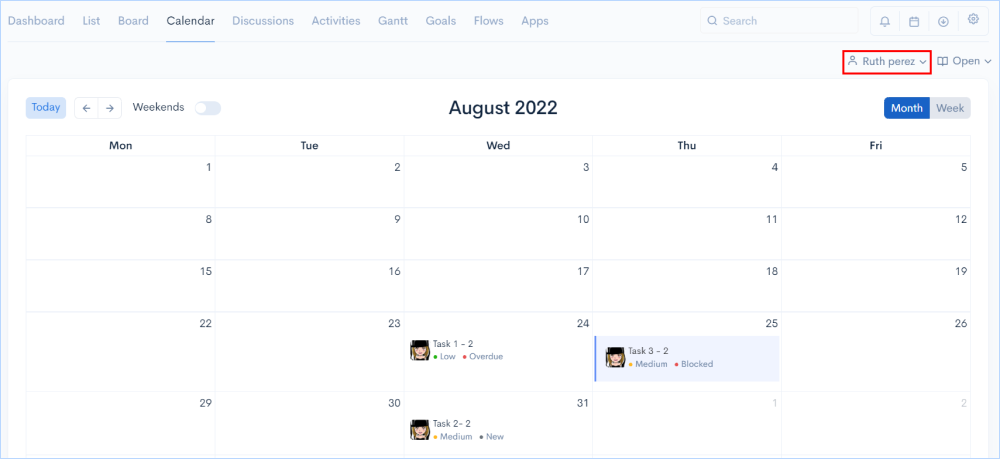
Task tracking is easier with Projectsly's calendar view, which allows teams to plan, manage, and visualize their tasks in one shared team calendar.
The calendar view allows you to review your project tasks in a calendar format. It can display 2 different views, a month-wise view or a week-wise view, which can be selected as per your convenience for better planning.
Go to Calendar from the features tab.

The calendar displays 2 different views, a month-wise view or a week-wise view, which can be selected as per your convenience for better planning.
If you want to change any parameters such as assignee, due date, status, dependencies, goals or any other of a specific task, then directly select the task from the calendar and make the changes.
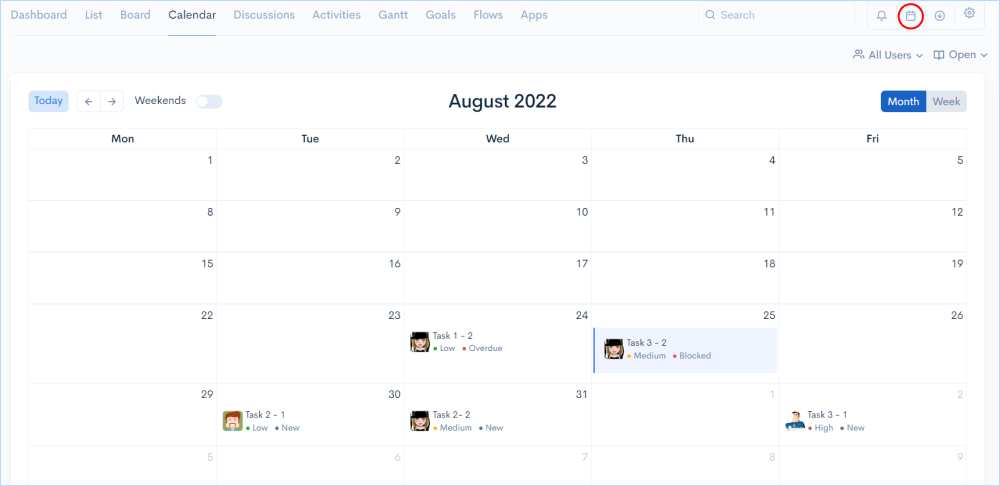
You can switch task views based on All users or by individual assignees for better planning. You can also easily view which all tasks are in open state and which have been completed, based on which the pending tasks can be identified with a better calendar view.
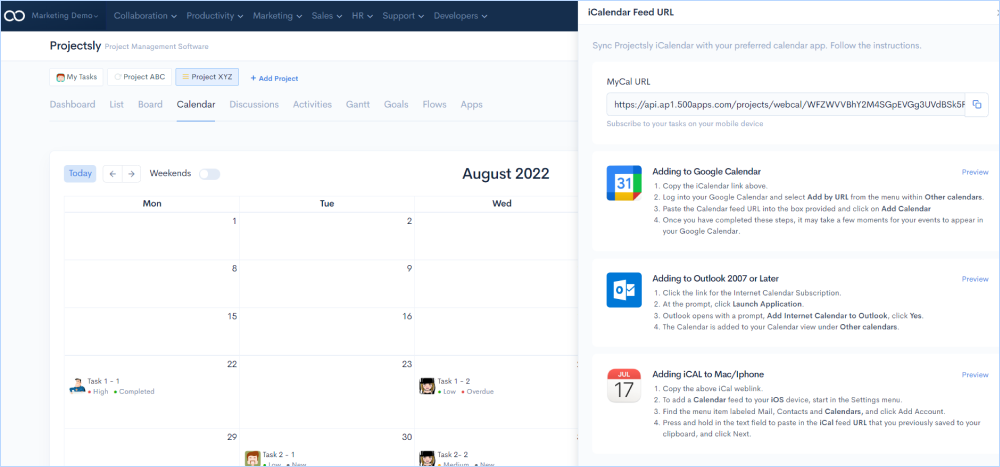
Sync the Projectsly’s calendar with your daily used app calendar such as Google calendar, Outlook calendar, Mac / iPhone iCal. Plan and track all the assigned tasks without always having to open Projectsly.
Once you click on the Subscribe the iCal icon, you’ll find a window displaying the instructions to sync the calendar to the 3rd-party apps.
While managing projects, it is vital to know the progress of every task right from the start to the finish, so as to manage resources, capacity planning and task dependencies, creating a pathway for successful project completion.
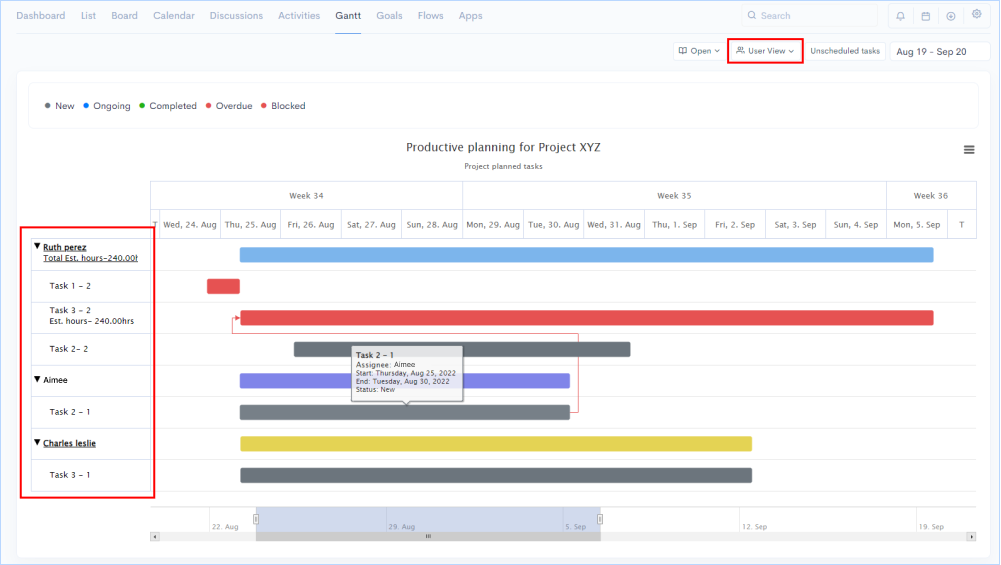
Projectsly's Gantt chart provides a visual depiction of tasks through colored bar charts, which provides a comprehensive overview of each task right from the time it is created to the time it is scheduled to be completed. This lets the manager see where the team stands with their tasks, whether they could meet the deadlines, better allocate resources, assign team members to different tasks, and visualize dependencies.
![]()
Visualize the tasks in multiple views for better planning. You can view the chart either in Task view or in User view. Task view displays all the tasks in each category created that gives a complete view of task progress. User view showcases tasks assigned to individual users or team members that help to see the progress of the team member precisely.
There is no point in working in circles if there are no clear goals. Projectsly keeps team goals top of mind, allowing teams to reduce conflict and move forward together. You can add goals by setting milestones.
Go to Goals in features tab > Add Goal

In order to add goals, you need to set milestones by adding tasks and giving them a start and end date. Once you have set all your goals, you'll fin the status of each task under the goals you have created, letting you to plan and finish them on time.

Automation is one of the finest features to be included in project management software that allows your team to spend less time on routine tasks and ensure your team doesn't miss any important steps.
Projectsly’s workflow automation feature lets you create workflows using a drag-and-drop visual designer making the team not look back at routine tasks and focus on the critical ones.
Go to Flows from features tab > Add Flow
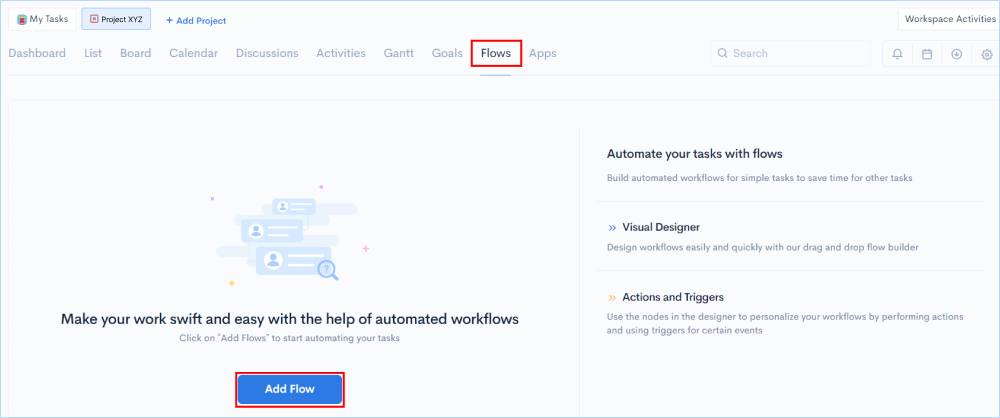
Once you click on the Add Flow, you will get a library of built-in workflow templates to choose or you can build a custom flow.

Projectsly comes with an easy drag-and-drop visual builder where you can create workflows to automate redundant tasks. It has a collection of nodes serving specific functionality, collectively helping to create the flows. Let’s see what each of them does.

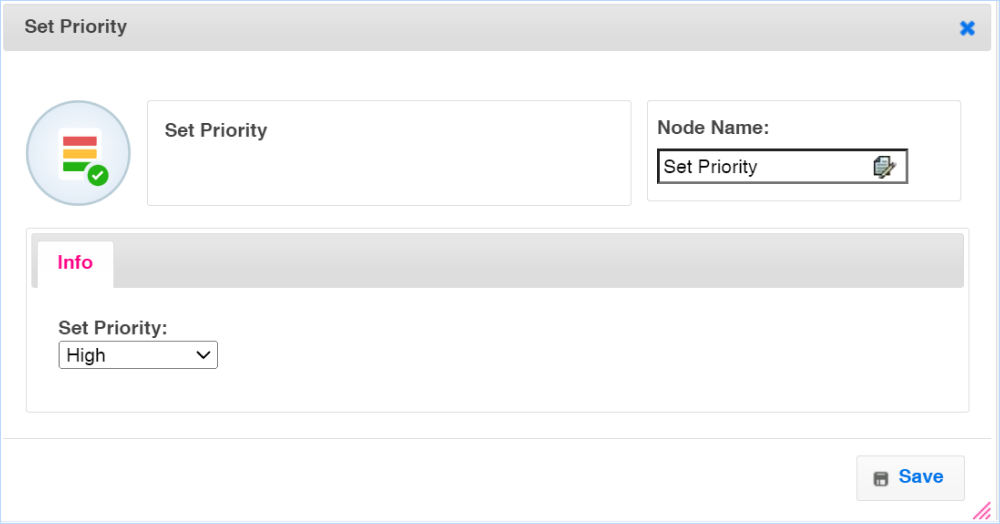
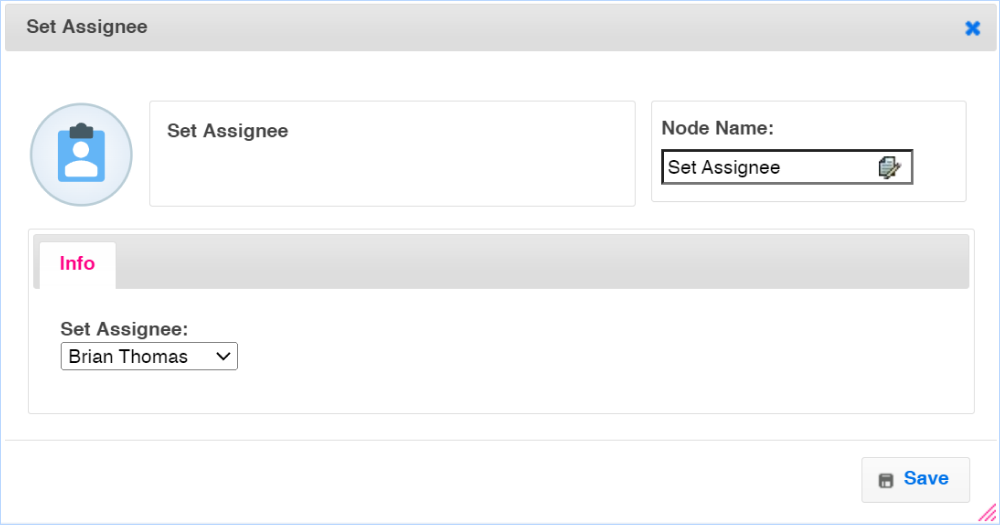


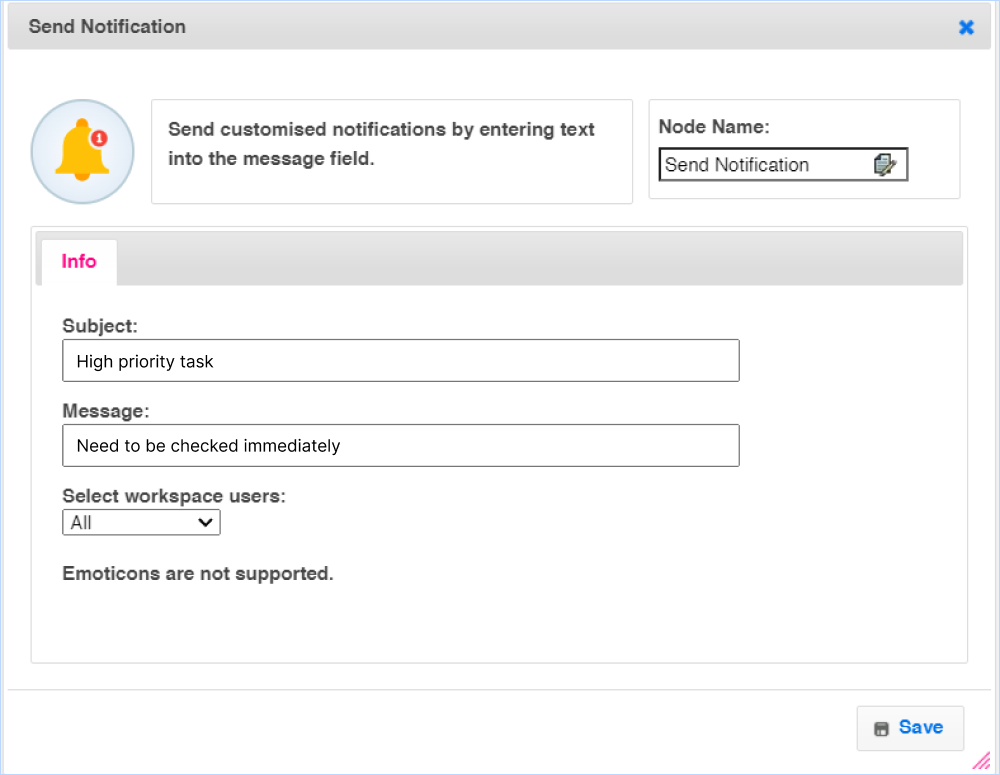
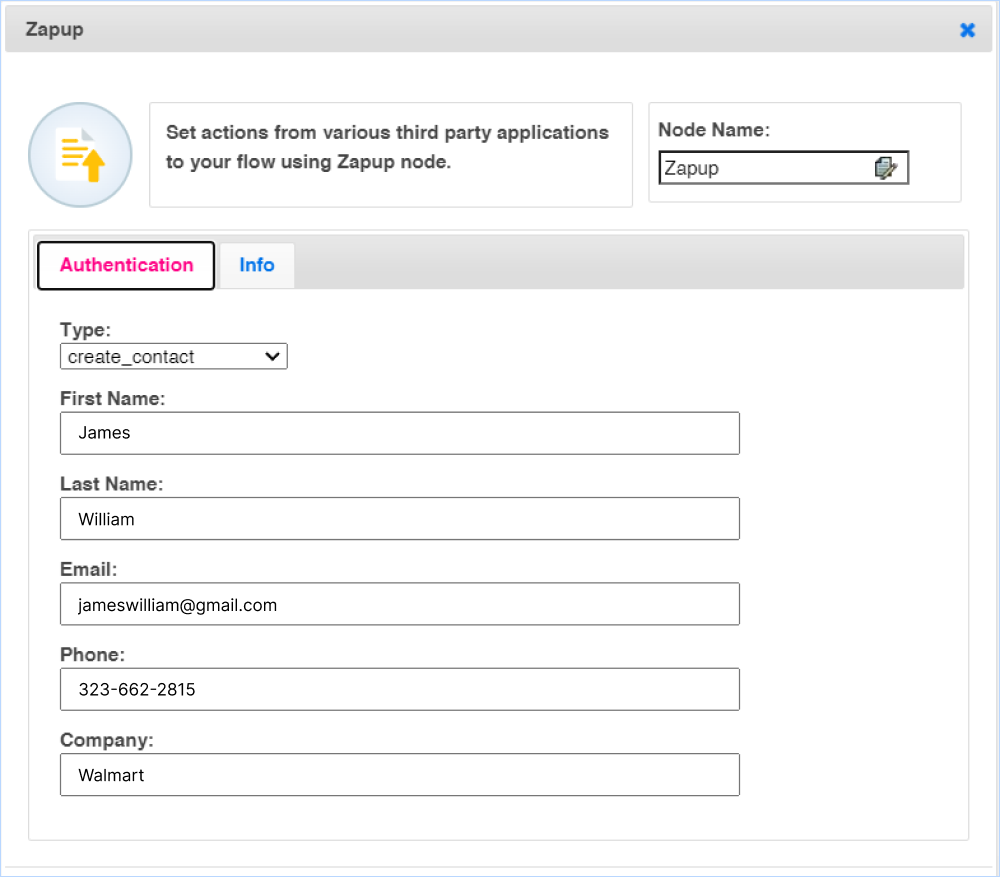
Here is an example of workflow automation for high-priority tasks.
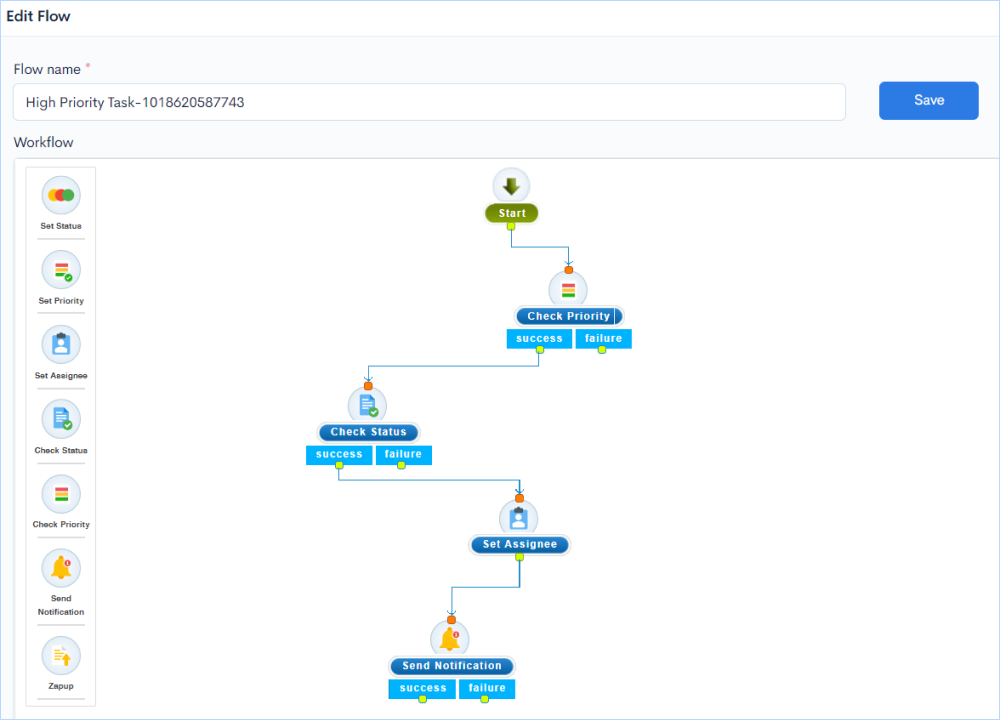
In this workflow, the system first checks the Priority of the task created. The condition given is ‘High’ and if it is true then the system checks for the status of the task. The condition given is ‘New’. If both the conditions are true then the system assigns the task to one specific member who has been put under the condition and an automatic mail is sent to him every time when the conditions are passed.
It is really important to conduct discussions related to projects and tasks with teams so that they don’t miss any critical steps.
Projectsly provides a discussion room for teams in particular projects to brainstorm, collaborate and share ideas and also to discuss any vital information related to the project they are working on.
Go to Discussions in the features tab.
Start sending messages to the team related to project work and keep them informed on all project related activities. Find the chat section to discuss on important aspects on the project with the team if they are working remtely. Use '@' along with member name to specifically mention and notify a member on any activity.
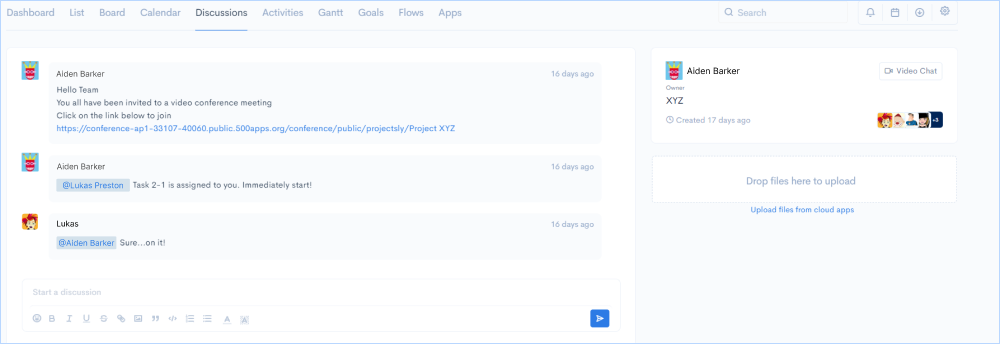
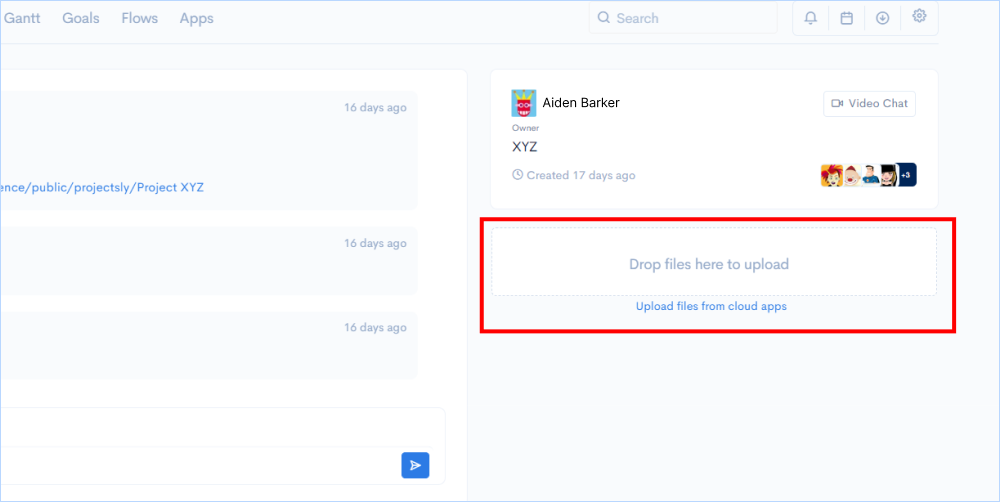
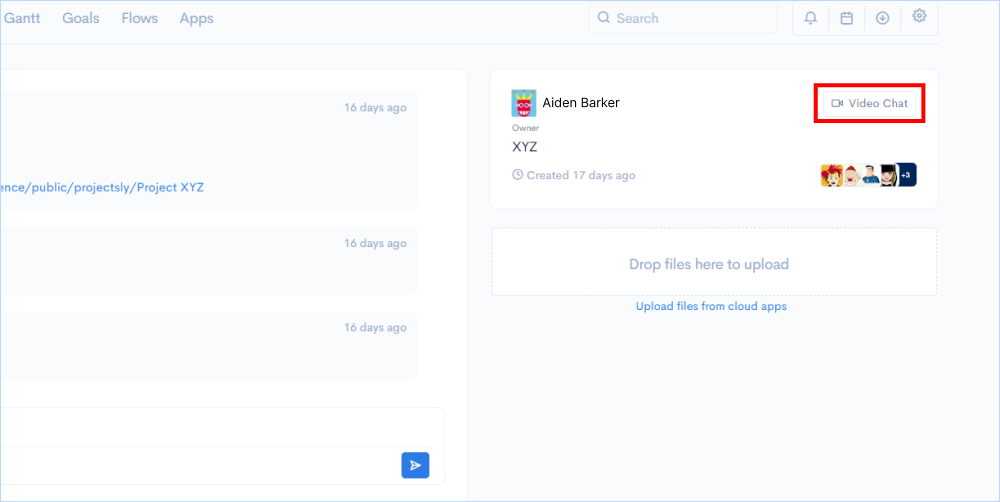
You can upload and share files with the team either from your local computer or from cloud applications like Google drive or Dropbox. You can preview the file you have uploaded or you can delete it.
Hold discussion with your team working remotely on project and task updates using the built-in video conferencing tool (500Conference).
It is very important that the project team should be informed about all updates related to projects and tasks.
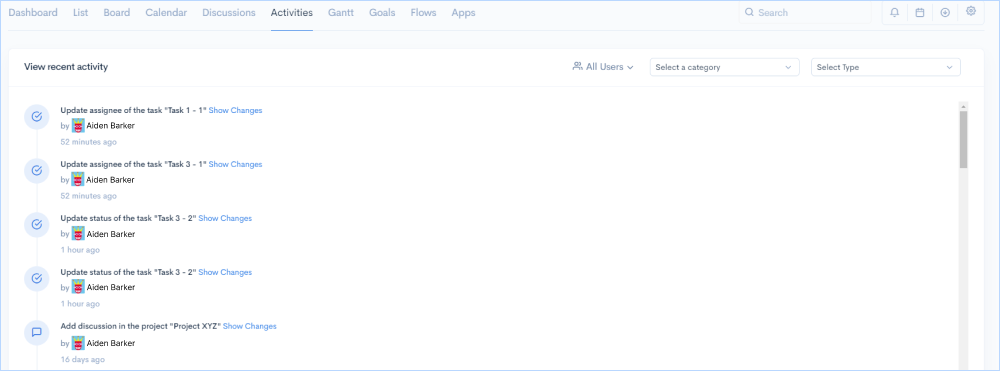
Projectsly’s activities section gives real-time updates on all the changes and updates happening in the project. For example, when a new task is created in the list or kanban section, you will get an update in Activities that a new task is created along with the date and time.
This section also gives you information on who created the project and tasks, who updated the tasks and every other information related to the project.
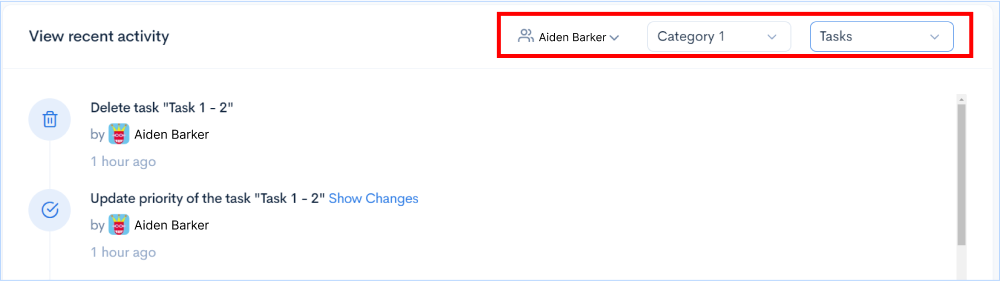
You can customize the view of activities based on category, type or by assignees.
For example, you want to see the task updates of a particular member of the team. By choosing the member, you will be able to see all the changes made by the team member on the task assigned to him.
As a Project manager, it is of high priority to compare data and make informed decisions. For that, they require a system that gives a comprehensive view of the progress of the project and its tasks.
Get critical reporting and metrics information with Projctsly’s Dashboard, which displays real-time key metrics and performance indicators that, that in-turn help businesses scale.
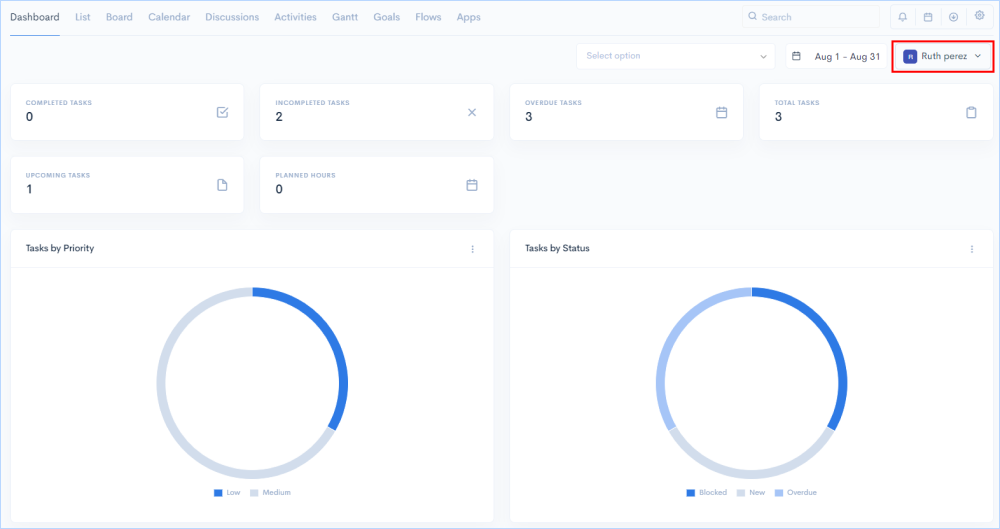
The dashboard displays an overview of the completed tasks, incompleted tasks, overdue tasks, total tasks created, upcoming tasks and total planned hours.
Go to Dashboard in the features tab

It visually represents task progress by Priority, Status, Category, Due date, Assignee, and Estimated Hours vs Actual Hours using pie charts, making it easy for the manager to get meaningful insights.
You can select the date range on which you want to see data and make an analysis. You can customize the view in which you want to see the data based on the categories you have created or with the user level.
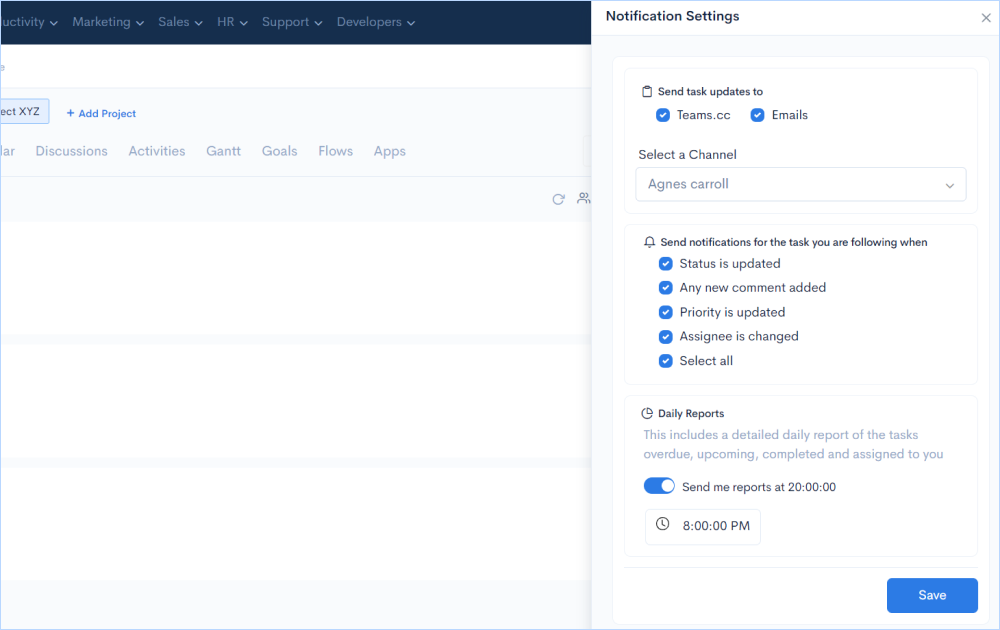
Send notifications to the team via email or our built-in team collaboration channel, Teams.cc (integrated with Projectsly) about updates regarding the project such as changing task status, priority, adding new comments, changing the assignee, and more.
Go to the bell button on the top right of the screen and click on it.
Once you click in the notification button you will get a windows to choose the channels you wish to send or receive notifications along with the option to choose when to get them.
Go to the next level with ![]()
Get 50 other apps with Projectsly - Join the SaaS Revolution - 500apps, $14.99/user flat pricing, 24/5 Support (Phone/Email/Onboarding)
